Tag Archives: Made by Rae

Baby gifts

So one of our good friends had her first baby, oh back in May, and I just last week got around to sending off her baby gift!  It’s actually been done for at least two months, and just languishing in my sewing room, waiting for me to pack it up and put it in the mail.

But if I had sent it out in May when the baby was born, I wouldn’t have found a hidden box of N’s old baby clothes, and I wouldn’t have known that I had a whole pile of Hawkeye baby clothes just sitting around unused.  And therefore I wouldn’t have been able to send this die-hard Hawkeye mom a whole slew of Hawkeye baby gear just in time for football season.  That part of the gift is even sweeter since her husband is a Huskers fan 🙂

(For the non-Midwesterners, the Hawkeyes are the University of Iowa where i went to law school, and the Huskers are the University of Nebraska.  Iowa and Nebraska are both in the Big 10 since Nebraska defected from the Big 12 a few years ago and play a big game on Thanksgiving weekend).

But in addition to that Hawkeye gear and a fun book (here), I also made a couple little things for the new little lady.

First this:

Creative Counselor: baby gift bib

And then this:

Creative Counselor: Baby Gift Peekaboo Bonnet

Continue reading

Happy birthday Washi!

The Washi dress, the very first women’s pattern released from Made by Rae, turned three years old this week!

Creative Counselor: Happy birthday Washi!

So I don’t typically celebrate birthdays for random patterns, but Rae decided to have a Washi birthday celebration and since Washi was one of the first patterns I sewed successfully for myself, I decided to join in!

Continue reading

KCW outfits for the boy

I wasn’t as productive as I had hoped during summer KCW, but I did manage to finish a couple of outfits for each kid. Here are J’s:

Blank Tank and Parsley pants for KCW Summer 2014 sewn by Katie @ www.creative-counselor.com

Rocket ship tank with blue linen pants

Blank Tank and Parsley pants for KCW Summer 2014 sewn by Katie @ www.creative-counselor.com

Airplane tank with brown chambray pants

No new patterns or reviews here — when I sew for J, I pretty much stick to my TNT patterns anymore. He has fairly simple and predicable taste in clothes. Comfy t-shirts and tanks, loose, comfy pants or shorts … do you sense a theme?

Continue reading

The prettiest little flower girl you ever did see

Goodness, did the month of May run away from anyone else?  As soon as we got back from our trip to California, work got really busy, Me-Made May set it, and days started to disappear.  I managed to finish outfits for the first two weeks of Project Sewn, but missed week #3 (as usual) and it’s going to be hit or miss whether I finish anything for Monday.  We’ll see.

But, on to the matter at hand — a flower girl dress!

The main purpose of our California trip last month (other than to visit family — Albert hails originally from SoCal) was to see our good friend Leslie get married.  Leslie is a friend of many years, and it was amazing to her as blissfully happy as she is with Bob!  She is also N’s godmother, so both J and N got to be in the wedding.

Made by Rae Geranium dress turned into an adorable flower girl dress by the Creative Counselor

The wedding party. Yay, they’re married!

I made almost all of the clothes that both the kids wore, but today I’m talking about N’s flower girl dress.

Made by Rae Geranium dress turned into an adorable flower girl dress by the Creative Counselor

Isn’t she sweet?

For the dress, I used a TNT pattern, about the most versatile, customizable little girl dress pattern out there — the Made by Rae Geranium dress.  Seriously, you can do anything with this pattern.  Dress it up, dress it down, embellish it, whatever you need.  The pattern is so well drafted and the shape is so classic that it works for pretty much any occasion.

The wedding colors were gray and lavender with a theme of “burlap and lace.”  So I made the whole dress in gray silk dupioni from Michael Levine and did an overlay of lavender lace on the skirt.  For the sash, I used lavender silk dupioni, again from Michael Levine.  The bodice was lined with a basic gray lawn to keep it soft against her skin.

As you can see, I went sleeveless for this dress with the gathered skirt.  I like the cap sleeves in the pattern, but for the dressiness of this event, sleeveless seemed more appropriate.

But without a doubt, the best part of this dress has to be the buttons!  Rather than just raid my stash for whatever was available, I wanted something special for this dress.  I found these amazing Swarovski crystal buttons from Mood, and had to order 3 for the back of this dress.

Made by Rae Geranium dress turned into an adorable flower girl dress by the Creative Counselor

Can you see the buttons? They’re small here, but gorgeous!

$30 for three buttons is pretty rich, so I absolutely will be reclaiming them when she outgrows it!

N loves her dress!  She refers to it as her “wedding dress” and wore it when I took her to see the Kansas City Ballet perform Cinderella for her birthday.  Another indication of how great Geranium is — this dress was comfy enough that she wore it and ran around it in all day and was never too hot or uncomfortable.

Made by Rae Geranium dress turned into an adorable flower girl dress by the Creative Counselor

Little goofballs. She adores her big brother!

By the time you factor in fabric costs and the buttons (silk and crystal ain’t cheap), I doubt it was any less expensive to make her dress than it would have been to buy one.  But I also doubt that I could have found a RTW dress with the details I could add or one that so exactly matched the colors and theme of this wedding.

And that, my friends, is why we sew 🙂

The Poastal Pants

** Disclosure: This post contains Blank Slate Patterns affiliate links, but, I paid for the patterns used out of my own pocket, and all opinions are 100% my own!

I actually made these pants for the kids’ yearly photo shoot back in May, and then they didn’t get worn in the photos.  Oh well, J really likes them and wore them quite a bit before the weather got ridiculously hot!

These are essentially a mash-up of the Made by Rae Parsley Pants, and the Blank Slate Patterns Coastal Cargos, hence the name Poastal Pants!

Creative Counselor: Poastal Pants

The Poastal Pants

And J loves them! If they are clean and in his drawer, he wants to wear them. My kids are at ages now where they’re very picky about their clothes, so it’s always nice to stumble on something that they just love. These pants fit the bill nicely for J. They’re lightweight, super comfy, move really well, and he got to pick out the buttons! He also sat with me and handed me needles for much of the sewing process, and that always helps endear him to a handmade garment.

Continue reading

Washi #2: (Finally) in the books!

Creative Counselor: Washi Dress #2

My second Washi dress, made with Records in Absinthe from Ruby Star Spring by Melody Miller. Photo by Crystal Liepa Photography.

Those familiar with Rae’s blog may look at this version of the Washi dress and say, “Oh no you di-int!”  To which I reply, “Oh yes I did!”  Melody Miller Ruby Star Spring with giant records all over it — how could I not copy Rae’s dress?

This dress had been cut out and half finished in my sewing room for longer than I care to admit.  Before I got pregnant with baby #3, which should give you an idea of how long it has taken me to finish it!  In fact, I actually bought the fabric for the dress on the day I read Rae’s blog post about her Ruby Star Washi.  I wanted to be sure all you little vultures didn’t snap it up before I got any!

My full review of the Washi Dress can be found here.  The second time around, I still found this to be a wonderful pattern.  And these pictures demonstrate that it works very well as a maternity dress too!

Creative Counselor: Washi Dress #2 full view

Full view, bike and all. Photo by Crystal Liepa Photography.

I finished this one a little differently.  I omitted the cutout in the front, as well as the sleeves.  I used bias tape to finish all the openings and hand-stitched them down to avoid any visible topstitching.  The result is really nice but dang! that takes a long time!  I also did a hand-stitched blind hem on this dress so there is no visible topstitching other than the elastic casing on the back.

Because, oh yeah, I also skipped the shirring on this dress and used a single elastic casing where the bottom line of shirring would hit.  It was a really easy alternative and the finished result is just as nice.  Shirring is really easy too, though, so I’ll likely just switch between the two methods according to my mood!

I love this dress and I intend to wear it as long as I can while pregnant, which frankly, may not be too much longer.  I’ve hit the huge-boobs stage of pregnancy, and my belly is pretty darned big (I’m 23 weeks pregnant in these photos), so I think I’ll outgrow it soon.  It fits fine for the moment, but the size of my chest is making the armscyes pull in ways that aren’t always comfortable, so before long it will get put away until my post-pregnancy, post-breastfeeding days arrive.  But it will be a nice surprise then!

Quickly, the fabric is Records in Absinthe from Melody Miller’s Ruby Star Spring line.  It is perfect for this dress.  Nice and soft and fairly lightweight with a lot of drape.  It was also really easy to work with, and I am thrilled with the final result!

Creative Counselor: Washi #2

As Crystal said, if we were a rock band, this would be our record cover! Photo by Crystal Liepa Photography.

**All photos in this post were take by my good friend Crystal Liepa of Crystal Liepa Photography.  She is a professional wedding and family photographer based out of St. Paul, MN, who makes at least one yearly trip (more if we can talk her into it) to Kansas City and books sessions while she’s here!  I do try with photos, but I can guarantee you that Crystal’s photos will be the best you’ll ever see on my blog!  I just don’t have her skillz!

Purple Mouse Geranium Dress

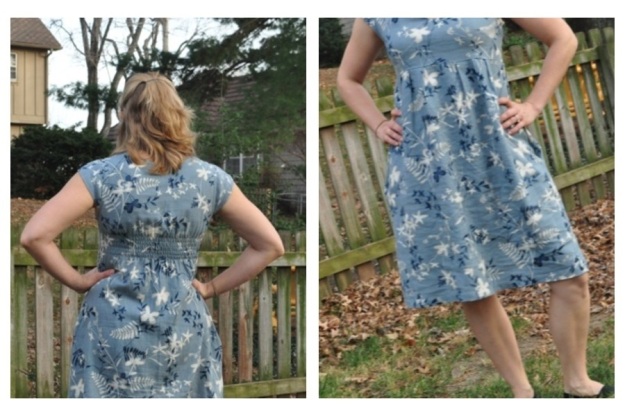
I jumped on the bandwagon last week and got the Made by Rae Geranium Dress.  And I’ll jump on the bandwagon again and declare that the Geranium Dress is awesome!

Creative Counselor: Geranium Dress

Made by Rae Geranium Dress. Photo by Crystal Liepa Photography

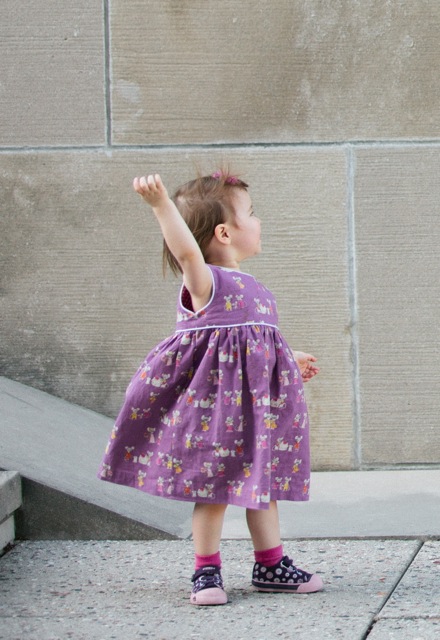
This is the first item that I finished for the kids’ upcoming pictures.  I knew that I wanted N to be able to wear the purple mouse fabric that I got her (and I didn’t want it to linger in my stash for a year like so many fabrics have tended to do), so I decided to start with this.

I made very few alterations to this pattern, which I made for her in View A, size 2T.  All I did was omit the sleeves, add piping at the arm openings, neck opening and waistline, add the pockets from View B, and substitute pearl snaps for the buttons.  Hmm, well maybe that is a few alterations!

Creative Counselor: Geranium Dress

This is one of maybe 3 times total that she has consented to wear this dress. Photo by Crystal Liepa Photography

I was really surprised how easily this dress went together!  If I hadn’t decided to complicate it by adding piping, I would declare this pattern to be “easy-peasy,” and it probably would have gone together with just a couple hours of sewing.  The piping added an extra step to everything and required me to use my zipper foot and sew really slowly.  And of course when I put the first bit of piping on, it was late and I sewed it to the wrong side of the fabric.  I had the whole piece sewn on before I realized my mistake — I hate it when I do that!

Because of the piping, I also had to hand-sew the bodice lining down at the waistline.  I tried to cheat and topstitch it with my machine, but it looked like crap.  I ripped it out and painstakingly hand-stitched the whole thing.  It looks beautiful but was a royal pain in the rear!

Creative Counselor: Geranium Dress

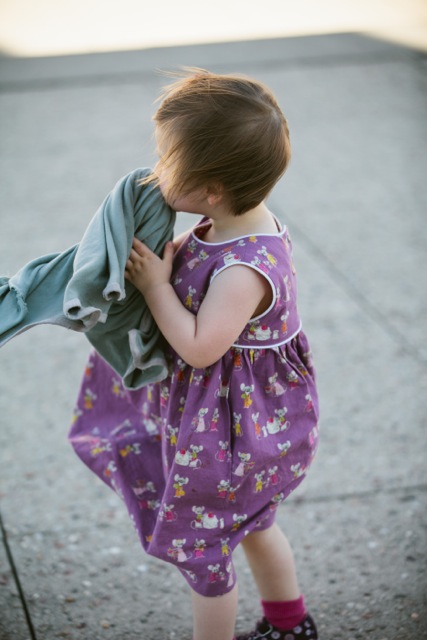
Back view. Photo by Crystal Liepa Photography

The fabric is Country Mice in purple from the Heather Ross Nursery Versery collection.  It is a cotton/linen blend, and is absolutely perfect for this dress!  It has a lovely drape and will breathe very well, but is substantial enough that it was really easy to work with.  The Geranium dress has a nice, full skirt and the linen in this fabric makes the skirt lay so nicely.

I got the fabric at Sarah’s Fabrics in Lawrence, Kansas (home of the University of Kansas), and if you’re ever in the KC or Lawrence area, make a point to stop by Sarah’s.  It is a freaking fabulous fabric store!  It’s lucky I don’t actually live in Lawrence — Sarah’s is kind of my new obsession!

The bodice lining fabric is a random pink gingham cotton seersucker that I got last summer at Joann’s.  I really loved this fabric so I got 3 yards of it and hadn’t used a single scrap!  It was nice to air out a little bit of it at least.  The rest will probably go into an Archer Shirt for me someday.

Creative Counselor: Geranium Dress

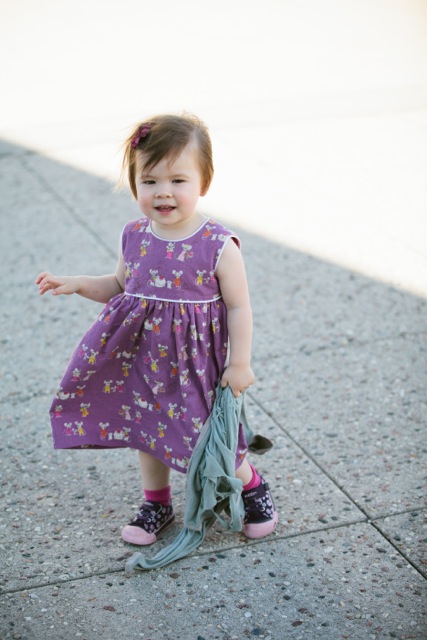
The dress in action. It was really windy that day! Photo by Crystal Liepa Photography

The long and short of it: Great pattern, great fabric, darling dress.  There are definitely a few more Geraniums in store for N!

Creative Counselor: Geranium Dress

Geranium Dress. Photo by Crystal Liepa Photography

Pattern: Made by Rae Geranium Dress View A (with the gathered skirt)

Size: 2T

Fit: Perfect, with some room to grow!  I haven’t gotten her to actually wear the dress yet, but I did get it on her for a minute before she changed her mind and could see that it fits exactly as I intended.

Modifications: Omitted the flutter sleeves from View A; substituted pink pearl snaps for the buttons called for in the pattern; added the in-seam pockets from View B; added white piping at the neck and arm openings and at the waist.

Physical pattern:  PDF pattern, which isn’t my favorite, but this one wasn’t too bad.  Rae is really good about telling you which pages to print for the size that you need to make.  I traced my skirt pieces on to freezer paper and cut my bodice pieces straight from the pattern since the PDF is set up with each size’s bodice pieces on a different sheet of paper.

Fabric: Heather Ross Nursery Versery Country Mice in purple (main).  Pink gingham cotton seersucker (lining).

Pros:

  • So many variations!  The pattern includes 2 lengths, 2 sleeve options, and 3 necklines.  By removing the sleeves altogether or adding details like piping or rick rack, the possibilities are endless!
  • Simple design really allows a nice print to shine.
  • Straightforward construction.  The finished product looks like the pattern should be hard, but it is seriously easy.
  • Printing and piecing was about as good as you get for a PDF pattern.

Cons:

  • Buttonholes — this is probably a personal thing since I just don’t like buttonholes.  Though from a practical standpoint, it’s like wrestling a snake trying to get N to stand still long enough for me to button her into a dress.  Snaps eliminate that problem!
  • I wish the sizing went above size 5.   Granted, a 12-year-old probably wouldn’t want to wear a dress like this, but I certainly think it could still be appropriate for a 7 or 8-year-old.

Overall grade:  A.  This is a very versatile pattern that can serve so many needs.  It would be equally appropriate for a fancy occasion or playing in the sand, depending on the fabric and options used.  A great staple pattern.

It’s Nautical, Baby!

Here it is, spring top #2!

Creative Counselor: Ruched Maternity Tank

Tank from Megan Nielsen Ruched Maternity Tshirt pattern

This tank is made once again from the Megan Nielsen Ruched Maternity T-shirt pattern, an absolutely fantastic basic maternity tee.

This time I eliminated the sleeves and narrowed the shoulders a bit to make it into a tank top.  I could have made the straps a bit thinner, but at least I’m pretty much assured that my bra straps will stay covered up.  I don’t mind it at all!

I added a neckline binding, just like with my maternity tshirt, and also did a contrast binding to finish the armholes.  Those were about the only alterations I made to the pattern, other than the obvious of adding a pocket.

Creative Counselor: Ruched maternity tank pocket

Tiny pocket.

Also, because the white stripe was slightly sheer, I had to add a tab over the shoulder seam.  Without it you can totally see the seam and stitching on the inside!  I always reinforce the shoulder seams of my knit tops with twill tape, so it really wasn’t very attractive to see the seam.  I like the fix though.

Creative Counselor: Ruched maternity tank shoulder tabs

A nice, easy way to hide the shoulder seams. I could have actually sewn the seams on the wrong side and made the shoulder completely seamless on the inside — maybe next time!

The fit is great!  Length is perfect and it fits nicely in the bust and across the shoulders.  I think I’ll get a lot of use out of this tank this summer.

And I must take a moment to gush about the fabric too.  This is the navy and white stripe slub jersey from Girl Charlee fabrics.  The quality is markedly better than the random poly-cotton knit I used on my first ruched maternity tshirt, which was essentially my muslin.  The knit on that top started pilling on the first wear and stretches out a lot more with wear.  This jersey holds up so nicely.  It’s really soft and doesn’t pill much at all.  It’s also really easy to work with — very little rolling at the edges that can make knit such a headache.

Creative Counselor: Ruched maternity tank

Lovely navy striped knit. I’m a little obsessed with navy and white lately.

I order most of my knit fabrics from Girl Charlee these days.  It’s some of the nicest knit that I’ve worked with so far.  It’s not THE nicest — that honor would go to the luscious bamboo jersey that I picked up at the Michael Levine online store.  That jersey is amazingly soft and drapey, with a little more heft that the Girl Charlee jersey that gives it a wonderful hand.  It’s actually the orange that I used for the contrast on this top!  But, the Girl Charlee jersey is also about 1/3 the price of that bamboo jersey, and is certainly NOT 1/3 the quality.  And I love their prints — I’ve been going a little crazy lately!

(And FYI, I am not sponsored by Girl Charlee.  I pay for all my fabric just like everyone else.  I’m actually not sponsored by anyone — not that I’d object!).

I think that pretty much sums it up.  I really like this tank.  I hadn’t been planning to make any more maternity-specific tops since I will only have a few more months to wear them.  But this is so comfortable and versatile that I think I might make one more to get me through the hot summer months!

How’s your spring top sewing going?

Stripey Maternity Tee

So here it is–my first entry into the Made by Rae 2013 Spring Top Sewalong!

Creative Counselor: Ruched Maternity Tshirt

Megan Nielsen Ruched Maternity Tshirt, and my first top for the Spring Top Sew along!

Since most of the of-the-moment patterns this year are obviously not going to fit me in my current preggo state, I’m using this spring’s sew along for motivation to complete my summer maternity wardrobe.  By pregnancy #3, I have a huge number of maternity or maternity-appropriate clothes, but both of my kids were born in May.  That means I was pregnant from September through May, and needed maternity clothes from about November through May.  In short, I have no summer maternity clothes.

I will mostly be able to get by with what I have, but I will certainly need a few more tops and tees for the hot Kansas summer.

This top was essentially my wearable muslin for the Megan Nielsen Ruched Maternity T-shirt. I say “wearable muslin,” but I was always pretty sure that this top was going to fit right.  My measurements tend to put me at the top end of the S size or low end of the M size in Megan Nielsen patterns, so I decided to err on the side of caution and cut an M.

Creative Counselor: Ruched Maternity Tshirt

Spring has finally sprung here. The weather is gorgeous, just wish I had more foliage for prettier pictures!

The fit could not be better on me!  Everything fits perfect, is the perfect length, and because my fabric is so stretchy, there is plenty of room for growth.  And believe me, I WILL grow!  I am one of those women (fortunate or unfortunate — kind of depends on your point of view) who carries babies completely out in front, not tucked back into my torso at all.  That means I tend to get huge.  I am currently only 17 weeks (less than halfway) and already look bigger than many women get in their third trimester.

I’ve read some reviews complaining that this t-shirt is a bit too short either in front or in back.  That was not a problem for me.  I didn’t mess with the length at all on this top.  I am fairly short, only 5’4″, with a relatively short torso, so maybe that’s why the length was so perfect on me.  This top hits me at exactly the right place in the back and the extra length in the front means I’m not in any danger of showing off any swollen, stretch-marched baby belly.  Whew!

Creative Counselor: Ruched Maternity Tshirt

See? No flashing! (FYI, photo by J. Not bad for an almost 4-year-old).

The only alterations I made were to add a box pleat at the top of each sleeve and to change the neckline finish.  I don’t know if it was because the sleeve piece was too large or if my super-stretchy fabric just stretched out, but the sleeve piece ended up being 2-3 inches too big for the opening.  I like the extra feminine detail that the pleat adds though and it took care of the extra fabric quite handily.

I also did a neckline binding instead of the finish directed in the pattern.  The pattern just tells you to turn the neckline under 1/2 inch and sew.  I tend to think that looks a bit “homemade,” rather than “handmade,” if you know what I mean.  Instead, I just cut a strip of my fabric that was about 34″ long and 1.5″ wide and did a binding.  I think it looks much more polished.

The fabric is a random, stretch poly-cotton blend jersey that I picked up on uberclearance from Denver Fabrics.  I seriously think I paid less than $3 per yard.  It’s pilling faster than a higher-quality jersey would, but it’s really soft and comfortable, and has a ton of stretch.  Perfect for a maternity t-shirt!

Creative Counselor: Ruched Maternity Tshirt

Another windswept photo

Pattern: Megan Nielsen Ruched Maternity T-shirt

Size: M

Fit: Fantastic.  The length and fit are perfect on me.  I made no fit alterations, and this is definitely a top that will see me through to the bitter end of this pregnancy.

Alterations:  As mentioned above, each sleeve has a box pleat to correct for a size discrepancy between sleeve piece and opening.  Also, I did a neckline binding rather than simply turning the neckline under and sewing.

Physical pattern:  Awesome, as per usual with Megan Nielsen patterns.

Pros:

  • The ultimate, versatile maternity top.  This top can be dressed up for work or down for a casual weekend.
  • Quick sew.  The construction is very straightforward.
  • No tricky techniques here.  This is just your basic top.
  • Keeping the ruching in front only avoids extra bulk in the love handle area.  Let’s face it, us pregnant ladies don’t need any help there!

Cons:

  • Some have complained that the length is too short either in front or back.  Not a problem for me, but if you’re long in the torso, it’s probably something to think about.
  • The neckline finish gives it more of a “homemade” rather than “handmade” look.

Overall grade: A.  Super easy, fast and versatile maternity top.  If you’re in the market for a basic, staple maternity top, I would highly recommend this one.  The only reason I didn’t give it an A+ is because I don’t like the directed method to finish the neckline, but that’s an easy fix.

Washi, washi, washi!

So we’re back! Arizona was good. The Ironman went great. The trip was long, and we were all happy to get home!

I was also quite happy to be reunited with Sally, my beloved Singer, who went for her yearly maintenance while we were away. She’s back and humming along better than ever!

But now down to business — Washi!

Creative Counselor: First Washi Dress

My first Washi dress — I’m in love.  And I can’t typically wear a short-sleeved dress in early December in Kansas, but the temperature was in the 70s yesterday. Rock on!

I finally sewed together my very first Washi dress (the pieces have been cut and sitting on the floor of my sewing room for about 2 months — bad Katie!), and I can say with absolutely confidence that it will not be my last.

Get ready for some gushing (apologies in advance). I love, love, LOVE this pattern. Seriously, this may be the best pattern I’ve worked with, both in styling and construction.

Creative Counselor: First Washi Dress

Another full shot of my Washi — just couldn’t resist!

I’ll go through my pros and cons on the pattern below, but one thing I just have to mention — bust darts! These bust darts are perfect. I love the dresses I’ve made myself so far, but I’ve never been completely happy with the bust darts until this dress. These darts hit me in exactly the right place and look so seamless. They add a ton to the professional “storebought” look. I remember Rae posting when she was drafting the Washi dress pattern about her agonizing and rewriting of the bust darts. Well, all that work paid off because they are perfect!

I also love the way the bust darts are drafted in the pattern. I’ve never seen them done this way before. Rather than just having you trace the dart on to the fabric and fold it, trying to line up your lines, etc., the Washi Dress pattern actually has a cut-out where the bust dart goes. This may not seem like much, but it makes for absolute idiot-proof bust darts. No way to place these wrong because the fabric is cut out where the dart goes! Love this. I sometimes have issues with lining up my dart lines (particularly if the fabric and my fabric pen are too close to the same color), or the fabric slipping as I sew, etc. I’m going to start doing this on my bust darts from now on so I can’t screw them up!

I also love the styling. I’m usually not a huge fan of empire-waist dresses. I generally think they make me look pregnant — probably because I wore a lot of them when I was pregnant. But this one is really flattering and actually makes my belly look flatter rather than pregnant. I think that may be because it’s not a true empire-waist dress. The bodice extends a couple of inches below the breasts, which gives nice chest definition and hits at one of the narrowest spots on most women’s bodies. The whole silhouette is really nice.

Creative Counselor: First Washi Dress

See? No pregnant pooch!

Pattern: Made by Rae Washi Dress

Fabric: A nice, drapey printed medium-weight linen from Joann’s.

Size: Small (For anyone who may wonder, my bust size is 35.5″, and the bust measurement is by far the most important measurement in this pattern).

Modifications: None

Physical Pattern: It’s a PDF, which isn’t my favorite but all that was available when I bought the pattern. I hate cutting out all the pieces of paper. Washi is now available in a paper pattern, which is probably what I would have bought if it had been available at the time. I think the extra $ for a paper pattern is generally worth it.

Pros:

  • Bust darts! These are the absolute perfect bust darts for me! See my gushing above.
  • Pockets — the pockets are incorporated into the skirt pattern pieces, so there are no awkward seams where the pocket starts, it cuts down the sewing time, and you can’t screw up placement. I love that the pockets are seamless. You can barely tell that they’re there. I think I’m going to start making this modification to all my dresses and skirts with in-seam pockets, as long as I have enough fabic.
  • Sleeves — These little cap sleeves are the perfect size. They give some coverage if you wear the dress by itself but are the size and shape ensures that they don’t bunch up under a cardigan.
  • Pleats — Such a flattering alternative to the standard gathered waist.
  • Shirring — OMG. Can we say comfy? The shirring eliminates the need for closures (the dress just slips over your head), and makes the dress uber comfy. Not to mention that shirring is ridiculously easy.* This was my first time shirring, and I’m not sure why I was so nervous about it!

*Tip for those with top drop-in bobbins: Most tutorials on shirring (including Rae’s) will tell you not to stretch your elastic thread as you wind the bobbin. But, if your machine is like mine (a Singer 7470), that won’t work. You won’t get any tension in your thread and you’ll just end up with a wonky stitch that doesn’t gather up. Instead, you need to pull the elastic thread as tight as you can as you wind the bobbin. That way, the elastic thread will be nice and tight as you sew and will shir up nicely.

Creative Counselor: Washi Dress details

Check out those bust darts! Aren’t they awesome?

Cons:

  • Cutout — I’m actually not a big fan of the cutout on this dress. I like the cutout with the right fabric, but my fabric was so drapey that the cutout makes the neckline gape in a weird way. I probably should have interfaced the bodice piece around the cutout in addition to the facings. I prefer dresses like this in drapey fabrics, though, so I’ll probably just omit the cutout next time.
  • PDF pattern — But now you can buy the paper pattern!
  • That’s it. Seriously, I can’t think of anything else that I didn’t like about this pattern.
Creative Counselor: First Washi Dress

Funny neckline gaping. Definitely omitting the cutout with drapey fabric.

Overall grade: A+. Rae hit this one out of the park. It has me really hoping for more women’s patterns from her.

Now my dilemma is whether to make a second Washi right away (I have seriously awesome fabric for it!), or try out another probably-awesome and yet-to-be-sewn pattern in my stash. Decisions!

Creative Counselor: First Washi Dress

For good measure. Before Albert finished with the lawn, I enlisted J to take photos of my dress. Not bad for a 3 1/2-year-old!