Tag Archives: Oliver + S

Pretty in Pink: The (Modified) Popover Sundress

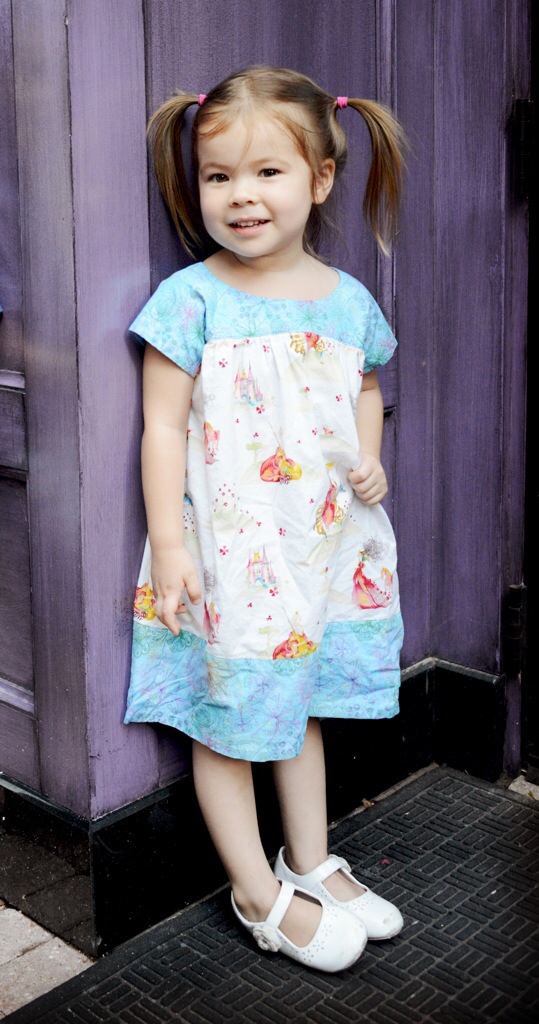
This little sundress for N was the first garment I finished during the recent Summer 2014 Kids Clothes Week, and it was a huge hit!

Darling Oliver + S Popover Sundress modified for more fullness.  Sewn by Katie @ Creative-Counselor.com

My first KCW make this summer. She wore it every day for the rest of the week.

This is a modified version of the Oliver + S free pattern, the Popover Sundress sewn up in Triflora Perfume voile from Anna Maria Horner’s Loulouthi line.  This light, floaty voile was absolutely perfect for this dress!

Continue reading

Pattern Review: Oliver + S Sketchbook Shirt

And here I am with another Oliver + S pattern review! This time for my boys. Now, Oliver + S has a nice line up of little girl dresses, but their boy offerings are pretty weak. The Sketchbook Shirt and Shorts are one of the only Oliver + S boys patterns that has ever tempted me. I decided to give it a shot last month when I wanted to make J and Baby J some button-up shirts for Baby J’s 9-month photos.

I searched around quite a bit for a good little boy button-up shirt and finally settled on the Sketchbook shirt since (1) it looked like the classic style I was going for, and (2) Oliver + S patterns are usually put together quite nicely.

Classic Oliver + S Sketchbook Shirts in chambray sewn by Katie @ Creative Counselor

My boys in their coordinating shirts. Photo by Red Bicycle Photography.

Continue reading

I scream, you scream…

This is one of my favorite little girl patterns — the Ice Cream Dress by Oliver + S. I never blogged my earlier two Ice Cream Dresses, which I made for N for her first birthday and her one-year pictures. I finally had to retire those earlier this year (she wore them as dresses, then tunics, then tops), so I decided to make her another one.

Adorable Oliver + S Ice Cream Dress sewn by Katie @ Creative Counselor

Ice Cream Dress. Photo by Red Bicycle Photography

I love this style for her age. Even toddler clothes can be pretty mature-looking these days, and I love the girly innocence of this dress.

Continue reading

Giveaway #2 — Oliver + S bundle

Now for Giveaway #2 — an Oliver + S bundle!

What sewing mama (or grandmama, auntie, daddy, uncle, whatever, we’re not exclusive here!) wouldn’t love a full set of Oliver + S  products to sew up for their little cupcake?

One winner will receive a paper copy of the Oliver + S Tea Party Sundress and Playsuit in size birth-24mo (this is an out-of-print pattern and now is available only as a digital download) along with 2 yards of coordinating fabrics from Oliver + S’ Modern Workshop fabric line for Moda.

20131209-221534.jpg

20131209-221546.jpg

To enter, simply leave a comment letting me know what lucky little girl would be the recipient of your sewing goodness.  I will choose a winner by random number generator. This giveaway will remain open until Friday, December 13, 2013 at 5pm PST.  Shipping to US domestic addresses only.

Update: The winner is Commenter #28, mjb who said:

I’d love this for my daughter!

What a lucky little girl! Congratulations!

Purple Eyelet Ruffled Halter Top

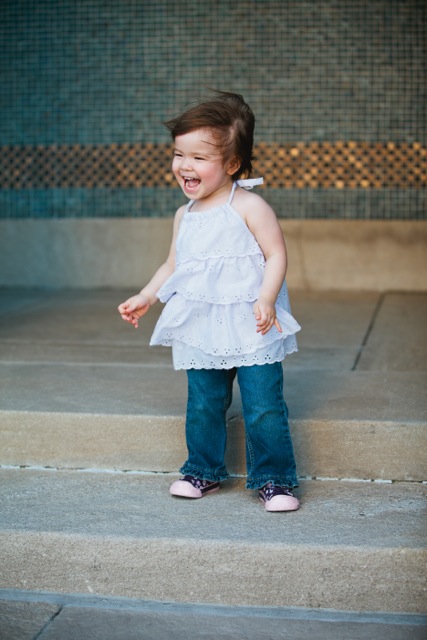
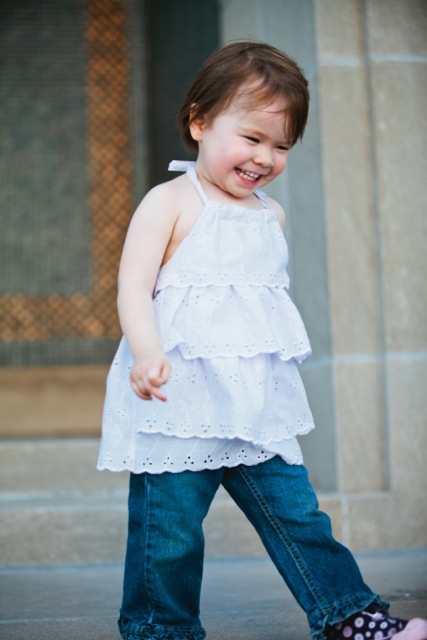
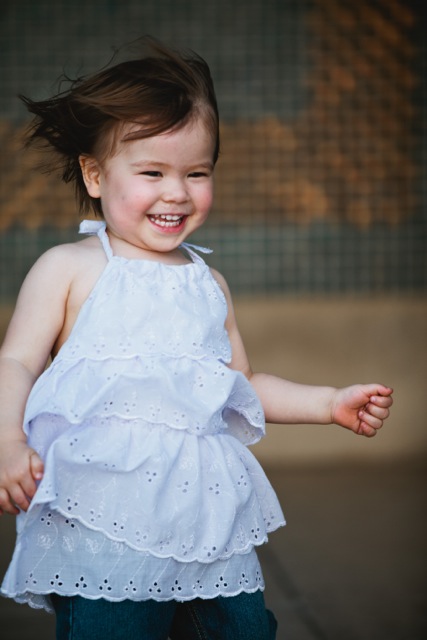
I had big sewing plans for the kids’ spring photos, but only managed to finish 3 of the items on my list (and finish a baby gift and a 4-year-old birthday gift in there). There was N’s Purple Mouse Geranium, a great pair of pants for J (yet to be blogged) and this top for N: The Oliver + S Ruffled Halter Top in an embroidered purple eyelet.

Creative Counselor: Ruffled Halter

Oliver + S Ruffled Halter. So sweet and dainty! Photo by Crystal Liepa Photography

It seems to be my M-O lately to bitch about Oliver + S patterns, but I honestly don’t have much to complain about with this one. Except the number of sheets in the PDF pattern — oy. Seriously, they could have cut the number of required pages almost in half simply by drafting a couple of these pieces on the fold! But, it’s a free pattern and it’s darling, so I didn’t complain too loudly.

I was really, really pleased with how this top came out, and pleasantly surprised at how easy it was to sew! Once I managed to wrap my brain around piecing together 24 sheets of paper for a kids’ pattern (yes, I’m still complaining about that, I promise to get over it soon), the top itself sewed up really fast and easy.

Creative Counselor: Ruffled Halter

Ruffled Halter. Photo by Crystal LIepa Photography

I had to tweak the top ruffled pattern piece a bit to get the effect that I wanted. My fabric, a lovely pale purple embroidered eyelet from Fabric.com, had a great embroidered scalloped edge, and I really wanted to use that for the bottom of the top and the edges of the ruffles. The top ruffled pattern piece does not have a straight bottom edge, so I had to tweak it a bit and as a result, it’s not as full as it would otherwise be. Still, I don’t think it detracts from the top.

Using the scalloped edge also meant that the ruffles are not cut on the bias as the pattern instructs. The top still works because the fabric was very lightweight and had a great drape. Quilting cottons come in cute patterns, but there is definitely something to be said for using apparel fabrics to make apparel, even children’s apparel.

Creative Counselor: Ruffled Halter

Totally moveable! Photo by Crystal Liepa Photography

The only change that I should have made to the pattern (and didn’t even think about until it was too late), was to shorten the main front and back piece by a couple of inches since I was planning to use the scalloped border of the fabric rather than hemming those pieces. As a result, the main pieces extend about 2 inches below the bottom of the bottom ruffle. The fabric and edge are so pretty that it doesn’t really bother me, though — it really just looks like a fourth ruffle.

I also didn’t bother lining or underlining the eyelet fabric since the ruffles in front ensure that the front isn’t see-through. Since this is a summer top, I wanted it to be light and breathable, and holey fabric certainly adds to that quality! It was quite warm in KC when we took these photos yesterday (94 degrees, I think), so the extra ventilation was appreciated, I’m sure!

Creative Counselor: Ruffled Halter

Oliver + S Ruffled Halter. Photo by Crystal Liepa Photography

Pattern: Oliver + S Ruffled Halter Top

Size: XS

Fit: Perfect. This top fits her really nicely now, but there is still plenty of ease in the back elastic so she has room to grow. I plan to make her at least 1-2 more of these tops this summer and will stick with XS.

Fabric: Embroidered pale purple eyelet from fabric.com. This fabric has been in my stash since last summer, but amazingly, they still have some left.

Modifications: I tweaked the top ruffle pattern piece so that I could cut all the ruffles using the embroidered edge of my fabric. I also cut all the ruffles on grain rather than on the bias in order to use the embroidered edge. No fit modifications at all.

Physical Pattern: Ugh, this PDF was a monster! 24 pages to piece together and nothing drafted on the fold. Seems like a waste of paper to me, but hey, it’s also free.

Pros:

  • Great price — free!
  • Darling top. I love how sweet and dainty this is for a little girl.
  • Very quick and easy to sew. Once I got my patterns pieces cut out, this top was done in a blink!
  • Good fit. The design is forgiving, so a single size will fit for a long time. N might even be able to wear this next summer!

Cons:

  • Pain in the rear to piece together.
  • Requires a ton of fabric for the size of the top. That’s because the ruffles are all cut on the bias.
  • The size XS fit my 2-year-old perfectly with plenty of room to spare. The smallest size of this pattern (XS) really is too big for a child younger than 18-24 months. It’s definitely and older-child pattern.

Overall Grade: A. My normal gripes about Oliver + S patterns (price and sizing) don’t really apply to this pattern since it’s free! I think this is a darling top perfect for a warm summer climate. N will get more of these!

Easter Dress #2

N’s second Easter dress is the Oliver + S Bubble Dress, minus the bubble. Two Easter dresses probably seems like overkill, but I haven’t made a lightweight dress for her since approximately last June, and I wanted to be prepared for possible festivities on Saturday as well as Mass on Sunday. So, two dresses seemed appropriate.

I’ve been eyeing the Made by Rae Geranium dress ever since it was released, but haven’t yet pulled the trigger. And this pattern is the main reason. I realized that without the bubble, the Bubble Dress is very similar to my favorite variation of the Geranium dress. So rather than buying another kid’s pattern, I decided to use my Bubble Dress pattern while N still fits into it (which won’t be much longer, the biggest size in my copy is 18-24 mo), get some value for the $14 I paid for the pattern, and wait to buy Geranium until I need it.

Creative Counselor: Bubble Dress

Easter Dress #2 — the Bubble Dress!

As with the Roller Skate Dress, I didn’t want the weight that goes with a fully lined dress, so I left out the skirt lining, hence no bubble. Instead of stitching the bodice lining to the skirt lining after I had sewn the main skirt piece to the outside bodice per the instructions, I simply turned under the bodice lining by about 1/2 inch and topstitched it down to the outside bodice. That also nicely hid the skirt seam.

I had to read the instructions for the back placket a couple of times, but once the light went off in my head, I realized that this was a super easy and efficient way to make a really nice-looking button placket. It looks so polished from the outside!

Creative Counselor: Bubble Dress placket

Placket with pearl snaps

The Bubble Dress was a nice, easy sew, and the finished product is darling. I had thought about adding flat piping at the waistline to break up the pattern just a bit, but I was rushing to finish before the kids came home from school, so I decided not to bother.

Creative Counselor: Bubble Dress back

Back view

Pattern: Oliver + S Bubble Dress

Size: 18-24 months

Fit: Right on. This is likely the “correct” size for N right now, which is good since it’s the biggest one in my pattern. The sizing is probably one of the most annoying things about Oliver + S patterns. To get the full range of sizes in one of their patterns, you have to pay $30 instead of $15 because the size ranges are limited.

Fabric: This is a broadcloth that I picked up ages ago from Chez Ami. It’s nice and lightweight for summer.

Modifications: I omitted the skirt lining, which means I also omitted the bubble. That makes the dress more simplistic, but also much faster to sew and cooler for the summer months. I also used pearl snaps in place of the buttons. I really didn’t feel like sewing buttonholes!

Physical pattern: I bought this pattern almost 18 months ago, so I actually have it as a printed pattern. It is the same quality you would expect of an Oliver + S pattern. The pattern is currently available only in digital format.

Pros:

  • Nice, easy sew. A great “blank canvas” for a cool print.
  • Lots of opportunity to get creative both with and without the bubble.
  • Easily modified to use snaps if you don’t want to bother with buttonholes.

Cons:

  • In my opinion, the sizing is the biggest con to this pattern. I have the smaller size range, which means that it goes from newborn to 18-24 months. N will outgrow that size soon, which means that I’d have to buy the next size up. This really annoys me about Oliver + S patterns. At least the newer ones all go to 4T in the smaller size range so you can get more use out of them before having to size up.

Overall grade: B. I mark this pattern down simply because of the sizing. It just makes it a really expensive pattern, especially for a digital pattern, when you have to spend $28 to get sizes birth to 5. Particularly when the Made by Rae Geranium dress pattern is very similar and available for $10 for the same size range with more built-in variations. When N outgrows this pattern, I will likely get the Geranium dress instead of the larger size range of the Bubble Dress.

Back at it!

I’m back at my sewing machine after my long hiatus and it feels go-ood!

I’ve finished projects for both J and N recently, but for today I’ll focus on my recent sewing for N. Namely, Easter dresses.

I wasn’t originally planning to make an Easter dress for her, what with being pregnant and laid up and all. But the other day I cleaned a massive quantity of outgrown clothes out of her closet, and after that, I realized that she didn’t really have any dresses that were appropriate for Easter festivities. Problem!

I have been busy prepping stuff for the kids for spring/summer sewing and the upcoming KCW, so luckily I already had one potential Easter dress already cut and waiting down in my sewing room. And I had recently received my lovely printed copy of the new Oliver + S Roller Skate Dress, which I had every intention of trying out promptly.

On Thursday I decided to “work” from home, since both kids were off at preschool or PDO. But since I had a nasty attack of pregnancy insomnia (worst pregnancy symptom ever — argh!) on Wednesday night and was up for almost 3 hours, my brain was in no condition to tackle legal work. I decided to sew instead.

I first tackled N’s Roller Skate Dress with the goal of making an Easter-appropriate dress that is still something she can wear throughout the summer. I ended up making a 2T for her so that she’ll have room to grow.

Creative Counselor: Roller Skate dress front

N’s Roller Skate Dress, all ready for Easter!

I must admit here that I kind of cheated on this dress. The pattern calls for the dress to be fully lined. While that would be nice in some ways, Kansas summers can be hot. Not Texas hot (thank God), but still pretty darn hot and frequently over 100 F, particularly in July and August. I know that I would be ridiculously hot in a lined skirt in that kind of heat, and I figured N would be too.

So, I left out the skirt lining. Instead, I cut the lining pieces off 1/2 inch below the bottom of the elastic casing and left the skirt a single layer. That allowed me to still have the nice finish on the sleeves and neckline, conveniently make the casing, but avoid the weight and heat of a lined skirt. And seriously, if I hadn’t told you, would you even know?

Creative Counselor: Roller Skate dress back

Back view. I think I did a pretty good job lining up the pattern. Not perfect, but pretty good.

The button is yet another one from the vintage button stash I inherited from Albert’s grandma and stepmom. I wasn’t sure I would find anything in that box that would go with my green and hot pink fabric, but lo and behold, this little beauty was in there. Perfect.

Creative Counselor: Roller Skate Dress detail

Vintage button

The dress went together really easily, typical of an Oliver + S pattern. Oliver + S really does a nice job with their printed patterns and instructions. I am rarely left scratching my head. The only thing I noticed about this pattern was that it appeared to lack any instructions on hemming. Either that or I was too dense to find them. Since I tend to test a lot of patterns, that was pretty glaring to me, not that it had any effect on my ability to finish this dress.

I plan to make several more of these for N for summer. I’ll probably try to choose fabric with similar colors so I can sew them assembly-line style!

Creative Counselor: Roller Skate Dress detail

Lining and border print detail

Pattern: Oliver + S Roller Skate Dress

Size: 2T

Fit: A little big on N, but I anticipated that. I hate making dresses that she outgrows after wearing them once, so I deliberately made this in a size that left her some room to grow.

Fabric: Main is the Lime Bandana border from Gypsy Bandana by Pillows & Maxfield for Michael Miller. The bodice lining is Pink Gypsy Paisley from the same line. I’ve had this fabric sitting around in my stash for at least 18 months. It was nice to finally use it!

Physical Pattern: I always get paper patterns where I can, and Oliver + S is one of the few indie children’s pattern designers that does nice paper patterns. The pattern quality is quite nice. The instructions are printed on heavy white paper rather than newsprint. They aren’t as nice as the nicest indie women’s paper patterns, which typically print instructions in booklets, but they’re as nice as you’re going to get in a children’s pattern.

Modifications: I did a partial lining rather than a full lining. I’ll post separately on how to modify the lining. It’s actually ridiculously easy.

Pros:

  • Super easy sew. It probably took about 1 1/2 hours of sewing, and that was with an exhausted pregnant brain.
  • Lots of options and potential variations. Beyond those listed in the pattern, you could modify the lining like I did, eliminate it all together by using facings and a contrast casing on the outside, and add all sorts of embellishments. It’s kind of a blank canvas.
  • The simplicity will make it super comfy.
  • No tricky closures. a simple button and button loop is all you have to deal with here.
  • Perfect to display all those wild quilting cottons. Also great for border prints.

Cons:

  • The instructions seem to lack directions on hemming. Not a huge deal, but it did leave me wondering how large a hem was intended.
  • No instructions that I could find on suggested length of elastic for the casing. Again, not a huge deal. I just used N’s chest measurement to cut my elastic, but it could be an issue if you’re sewing for a kid who’s not your own.

Overall grade: A. I think I’ll use this pattern a lot. It’s simple, versatile and a great run-around dress. My only “cons” are little nit picks that had no real effect on my ability to sew this pattern. Full recommendation from me!

I made another Easter dress for N to, but to avoid content and picture overload, I will post that one separately 🙂

Go Diego Go!

I made it through about 10% of my Handmade Holidays sewing list, but I did manage to make one thing for each of the kids. J got a Diego costume, complete with patch!

Creative Counselor: Go Diego Go

Go Diego Go!

J is starting to move on from Thomas and Friends and now is a HA-UGE fan of Go Diego Go, the boy offshoot of Dora the Explorer. He loves to strap on his backpack and go “find the animal in trouble.” A proper Diego costume was only appropriate.

The most identifiable item in any Diego costume (other than the Rescue Pack, which I had planned to make but ran out of time) is Diego’s vest. It’s an off-white cargo vest with a distinctive patch on the chest.

I was flipping through my children’s patterns, and saw that the Explorer Vest from the Oliver + S book Little Things to Sew would be perfect for a Diego vest. The vest even had the option of bellow pockets, which gave it a less “polished” and more “cargo” look — exactly what I was going for!

Creative Counselor: Back bellow pocket

The back bellow pocket

In addition to the bellow pockets, I added a couple of interior patch pockets to the inside of the vest, and I used the interior contrast fabric for the underside of the pocket flaps. I found a Diego iron-on patch on Etsy, which thankfully arrived a few days before Christmas.

Creative Counselor: Diego details

The details.

To go along with the Diego vest, I also made J a light blue t-shirt, just like Diego’s. I used Rae’s Flashback Skinny Tee pattern, adding a few inches to the bottom, and a light blue cotton/poly interlock from my stash. And I double-checked to make sure I cut the knit the right direction this time!

And I’m happy to report that J loves it! Even when he wants to stay in his PJs all day, he readily agrees if I ask if he wants to put his Diego costume on.

Go Diego Go!

Pattern: Explorer Vest from Little Things to Sew

Size: Medium

Fabric: Off-white cotton twill from Joann’s, lined with Ed Emberley Happy Drawing Lions and Tigers in Gold by Cloud 9.

Physical Pattern: Pattern books are among of the few paper children patterns that I have, and you all know how I love paper patterns! The pattern sheets in Little Things to Sew are pretty easy to work with. My only gripe is that the book doesn’t come with a pocket to hold the pattern sheets, so they just kind of float around once you’ve pulled off the sticky from the back.

Fit: The fit is great, and still gives him room to grow into it! J’s measurements actually put him one size smaller, but just barely, so I made the bigger size so he’d have some room to grow. I don’t plan to make another Diego vest soon — those bellow pockets took forever (relatively speaking).

Pros:

  • A couple of pocket variations mean you can have a vest that looks very polished, like the picture in the book, or more of a cargo vest, like the one I made.
  • Double-fold bias tape to bind the armholes is WAY easier way of finishing them with the lining.
  • Lots of pockets for stashing treasures.
  • The interior lining is a great place to use a cool contrast fabric.

Cons:

  • The bellow pockets take a long time to put together, and sewing through multiple layers of fabric can be challenging.
  • The pattern doesn’t include any pocket closures. I added velcro to each of the flaps to keep them closed.
  • Buttons make it hard for little hands to get the vest on and off. Snaps would go a long way to remedying that, though.

Overall grade: A. This is a well-drafted pattern with good options. The sewing world is overflowing with “fun” and accessories patterns for girls, but it can be hard to find them for boys. This is a good one.

One birthday dress, coming right up!

Cute birthday girl, huh?

Creative Counselor: Fairy Tale party dress

The Minnie Dress. Pattern: Oliver + S Fairy Tale Dress. Photo courtesy of Kati B.

My college friend Kati asked me to make her daughter a party dress for her third birthday party — a Minnie-themed tea party. Kati seriously does up the birthday parties, so I knew that the dress had to match the decorations and activities that Kati, who apparently has endless energy and creativity, would come up with.

The idea was to suggest Minnie without making her a Minnie Mouse costume.  Since the classic Minnie wears either a red polka dot or black polka dot dress with a poofy skirt and puffed sleeves, we decided to go with the black polka dots and red accents and a slightly more subdued, vintagey pattern.  I think it hits the perfect note!

I actually finished this dress at the end of October, but waited until pictures were available to post my review.

The pattern is the Fairy Tale Dress pattern by Oliver + S in View B with a few modifications. The Fairy Tale dress is designed to be a special occasion dress so it fit the bill nicely for this purpose.

The fabric is black and white quarter dots by Michael Miller with red Kona cotton for the contrast. This dress would look really sharp in fancier fabric like satin, taffeta or silk dupioni, but this little lady is 3, after all. Machine washable is very important!

Although the birthday girl is now 3, I made the dress in size 4T.  I think the pattern actually runs pretty true to size — she is tall and broad-shouldered and wears size 4-5 in regular clothes too.

This is among the most difficult of the Oliver + S patterns, but anyone accustomed to sewing adult clothing will find it pretty straightforward.  It uses many of the techniques that are common in women’s clothing — darts, lining, invisible zipper, etc.  All that made it a lot more time-consuming than your average girls dress, but nothing was particularly difficult.  Any issues I had (one in particular) were due to the slippery lining fabric and not the pattern.

So, now for the details:

Creative Counselor: Minnie dress

Little Sassafrass.  Photo courtesy of Kati B.

Pattern: Oliver + S Fairy Tale Dress, View B.

Size: 4T

Fabric: Main — Michael Miller quarter dots in black and white and red Kona cotton.  Lining — black lining fabric.  Underskirt — red tulle.

Modifications:  (1) The pattern as drafted attaches the sash at the side seams only and just ties in the back.  I always think that looks incomplete, so I added what is essentially a cummerbund on the front so that the sash had the appearance of completely encircling her waist.  (2) The red binding at the sleeves is a total cheat.  I was having a b&*$^ of a time getting the sleeve bias tape facings to cooperate with the slippery lining fabric.  After I ripped it out for the third time, I said f&*# it and went with red bias-bound sleeves.  I think it works.

Pros:

  • This dress is a nice complement to the Oliver + S lineup.  It’s definitely dressier than most of the other Oliver + S patterns, but certain occasions just call for a fancier dress.  But like all Oliver + S patterns, the instructions and drafting is top-notch and the styling is classic.  This will never go out of style.  I will undoubtedly use it for N (though I may omit some of the fussier details like the lining and underskirt), and will be equally able to use it for my grandchildren.
  • I love the little Peter Pan collar — adorable.
  • Optional tulle underskirt for a poofy, twirlable party dress.
  • Great details, typical of an Oliver + S pattern — invisible zipper fully enclosed in the lining for a nice, clean finish, hand-stitched hem, darts for a more fitted look (note that the darts are in size 2T and up, not the smaller baby sizes).
  • Very basic, classic silhouette.  If you eliminate the lining and tulle underskirt, this dress goes together really fast.

Cons:

  • Because of all the additional details, this dress is more time-consuming than your typical little girls pattern.  Honestly, while I plan to use this pattern for special occasion dresses, i probably won’t use it that often.  If I’m going to spend a week of sewing time on a garment, I’d rather that I be able to wear it when I’m finished 🙂  Yes, I fully admit that I am a selfish seamstress.
  • The lining fabric was a real pain in the butt to work with sometimes. Particularly at the tiny sleeve openings (as noted above).  It might not be so bad in the larger sizes.
  • Because of the bust darts, it really is a good idea to make a muslin, which just adds to the sewing time (though you’re likely to get a cute second dress out of it).
  • Lots of hand-sewing.  Very time consuming.  Hmm, I notice that most of my “cons” relate to the time it takes to make this dress.  I guess that’s because I’m just not used to kids clothing taking more than a few hours of sewing time, and this does.

Overall grade: B+.  It’s a great special occasion dress with classic styling, but a bit fussier than I generally prefer in a kids’ sewing pattern.

Creative Counselor: Minnie dress

Back view.  Photo courtesy of Kati B.

Creative Counselor: Minnie dress

Peter Pan collar — love it.  Photo courtesy of Kati B.