I went to look for my post about this outfit I made for J late last fall, but I realized that while I blogged about it for the (now inoperable) Sew the Show blog, I never wrote about it here!

Well, time to change that 🙂

I went to look for my post about this outfit I made for J late last fall, but I realized that while I blogged about it for the (now inoperable) Sew the Show blog, I never wrote about it here!
Well, time to change that 🙂
*Disclaimer: This post contains affiliate links which means if you click through to the EYMM store with one of these links and make a purchase, Kymy with throw a little sumthin-sumthin my way*
Welcome EYMM lovers! Today is my stop on the EYMM Capsule Skirt tour. And for once I’m making something for one of my kids rather than for myself.
**And don’t forget to read to the end for a coupon code!

When the opportunity arose to participate in this tour, I jumped on it because … Well, N really needs some new skirts! The girl grew like a weed over the winter and her legs are now a mile long. Which means that all the cute little skirts that she wore last summer are now indecently short on her. She still wears them (because all of her growth was up, not out), but she really shouldn’t.
So yeah. Today is the first day of the very first summer Kids Clothes Week, and how many kids clothes items did I prepare to sew? Exactly zero!
My kids both have overflowing closets (three sets of grandparents who love to spoil them will do that), and my own maternity and postpartum wardrobe is fairly pitiful, so my focus has very much been on self-sewing lately.
Luckily (I guess), I have a slew of cut but unsewn kids items in my WIP pile right now, so this KCW seems like a perfect time to try to plow my way through some of them.
I will be selective, though. There are several items for N that I cut that I probably won’t bother sewing together, perhaps ever. I cut a couple of darling little dresses for her, BUT, she has recently decided that she doesn’t like dresses anymore!
N’s Twos have made her even more opinionated, and she currently has about 4 t-shirts and 2-3 pairs of shorts that she rotates. All dresses are out of the rotation, as are most of her tops, particularly any dressier ones. Her favorite is a hot pink t-shirt with multi-colored butterflies all over it. If it’s clean, she wears it.
I do have a couple little tops cut for her, though, and they should be easy to sew together. Hopefully that won’t be an hour wasted!
J seems to grow only up and never out, which means that he can still wear the shorts he wore when he was a year old! In fact, his waist measurement is actually smaller now than it was 3 years ago (effect of losing the diaper I guess). I can’t keep the kid in pants that fit — they turn into highwaters seemingly within 5 seconds of acquiring them — but his shorts drawer is overflowing.
I have one pair of shorts cut for him from a super-cool Echino cars print that have been sitting in my WIP pile for at least two months. I plan to finally finish those this week!
The rest of my kid sewing this week will be baby-oriented, and likely not clothing. I really need to start working on the bedding for the baby’s nursery. The fabric has been purchased and laundered for over 2 months now, and it is high time to get those crib sheets put together! I know, I know, it’s kid’s clothes week, so I’m totally cheating. Ah well.
Anyway, here’s my goal list for the week:
If there’s any time this week once this is done, it’s all about me again!
Anyone else sewing along? What’s on your list?
One of my favorite things that I’ve gotten to do since I started sewing almost 2 years ago is test new patterns for independent pattern designers. It’s probably the Type-A litigator in me, but I love to take a pattern in its not-quite-final stage, look at it with a critical eye and give constructive feedback. I also love knowing that when the pattern is released to acclaim from our little community, I had some small part in making that pattern a success.
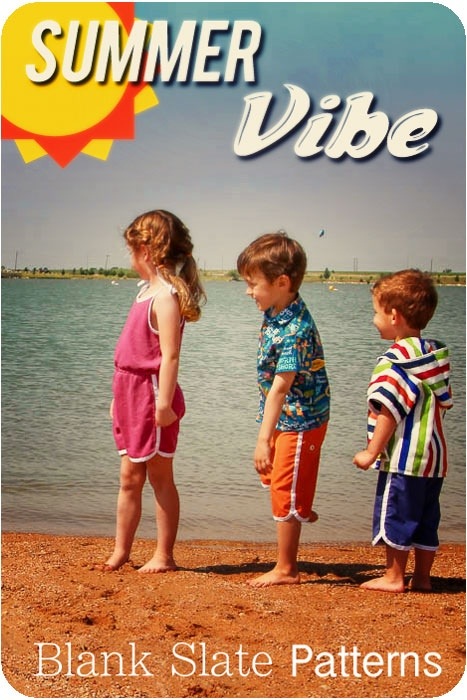
Melissa from Melly Sews and Blank Slate Patterns just released her newest summer pattern collection, Summer Vibe, and I was lucky enough to test all three patterns — the Retro Romper, Baja Hoody and Big Island Board Shorts!
This is not a full review of the collection since I haven’t had time to take decent photos of my garments in action, but those will follow. Photos are on my to-do list for the weekend, assuming the spring thunderstorms let up long enough for a shoot!
In the meantime, here is a sneak peak of my test garments (minus the board shorts — I couldn’t get proper board short fabric before feedback was due and I’m not a big fan of the fabric I had to use. Now I have board short fabric for 2 more pairs, though!). I am a big fan of all three patterns and will definitely recommend them!


Me-Made May starts tomorrow, and am I working on garments for me to round out my (rather limited) May wardrobe? No, I’m not.
Instead, I am still planning and working on kids’ clothes, even though Kids Clothes Week is officially over! As I explained, I use Kids Clothes Week for motivation to do the boring kid sewing that needs to be done, but I tend to put off. Now I’m planning and sewing outfit for J and N’s upcoming photos, and that’s much more fun!
I do have quite a list of projects for me going in my head, and a couple of them are even cut. But most likely they will get put off a couple of week, or get done piecemeal — a pocket here, seam there — sort of thing, as I work on other projects.
Our lovely and talented friend Crystal is a professional photographer in the Twin Cities area (check out her website here), and in a little under two weeks she’s coming to stay with us for a weeklong visit!
Hopefully the weather should be beautiful by then — no more of this freaky spring/winter we’ve been having lately (there is actually snow — SNOW — in the forecast for Thursday. In May…in Kansas!). Crystal generally comes to stay for a week once a year, and I always love the weeks that she’s here. Somehow life seems to slow down a bit, and we spend lots of time in the sun on the back patio, talking late into the night, cooking, drinking wine (maybe not so much for me this year), and just doing what good friends do.
And then in that week, she has graciously agreed to shoot J and N’s 4-year and 2-year, respectively, photos.
And photos means photo outfits. And around here, photo outfits means sewing projects for me!
I have big plans this year, too. I don’t often like sewing complicated things for my kids because inevitably those are the things that get tossed aside in favor of comfy shorts and a t-shirt, and since they’re kids, they outgrow stuff fast. But, I do make an exception for the yearly photos.
Our plan is actually two photo sessions, one outdoors at a park or garden, and one down in one of the more gritty, urban areas of Kansas City. That means two outfits for both kids, and my current plans involve 7 different items. Yeah, they may not all happen. So here goes:
1. A Geranium Dress for N. I broke down and bought this pattern when I realized that the 18-24m Oliver + S Bubble Dress fit her perfectly. As in perfectly right now, with little to no room to grow. The Geranium Dress goes up to size 5, and 2T is generally what I’m making for N right now to make sure it will last her through the summer and into fall, since dresses are very wearable here until at least November. I’m making the Geranium in this adorable fabric from Heather Ross’ Nursery Versery line for Kokka that I picked up at Sarah’s Fabrics in Lawrence.

And it’s purple!
2. Bubble Pocket Shorts in off-white linen for N. N only has 1 pair of shorts that will fit her this summer, and chances are she’ll be wearing a lot of them, so I picked up Elegance & Elephants’ new Bubble Pocket Shorts pattern. I’ve had a yard of off-white linen sitting in my stash for over a year, and it would be nice to stash-bust it!
3. An Oliver + S Ruffled Halter for N in pale purple eyelet. This is another fabric that has been in my stash since last summer, and I’d love to have it out! I think this top is just darling, and I love the versions that my friend Julie has made for her daughter (links here and here). But seriously, the thought of having to tape together 24 sheets of paper and then trace and cut my pattern has me dawdling a bit on this one.
4. Parsley Pants in blue pinstriped chambray for J. I also broke down and bought Rae’s new Parsley Pants pattern last week — she must be loving me! The pants pattern that I have used the most thus far is the MADE kids pants pattern, but that’s a free pattern in 2T only. WAY too small for J. When I saw Rae’s Parsley Pants in very much the same mold as the MADE pants, and graded to size 10, I knew this could be my new go-to pants pattern. I actually plan to morph the Parsley Pants and the Blank Slate Coastal Cargo pants because I’d love for J’s summer pants to be lightweight roll-up cargos.
5. Clean Slate Shorts for J in this awesome Echino print that I picked up at Sarah’s Fabrics. The main reason I’m planning to use the Parsley Pants for the chambray roll-up pants is because they’re designed to go together super-fast. Then I can spend most of my pants/shorts-making effort on these shorts. Because seriously, such awesome (and pricey!) fabric deserves a seriously awesome pair of shorts with a full working zip fly, front pockets and back welt pockets.

Echino cars in blue — does it get any more awesome for a 4-year-old boy?
6. and 7. Shirts to go with J’s pants and shorts. Probably a basic white t-shirt or polo to go with the chambray pants (yeah, I very well may nix sewing this and just buy it), and I’m thinking an orange shirt to go with the car shorts. J actually has a couple of orange polos that would work, but I also have a great piece of bright orange bamboo jersey fabric that would make an amazingly soft t-shirt. I originally bought it to make lovey-style blankets for the new baby, but I found these on Amazon that will go with our nursery and require no boring sewing by me. Win-win!
Anyone else have big sewing plans in their future?
I’ve been lurking the Elsie Marley blog all week, waiting for Meg to announce the dates for the Spring Kids Clothing Week. I’m usually far more motivated to sew for myself, so KCW is a great motivator to get me really focused on sewing for the kids. And this spring they desperately need it!

And for all of you with kids to sew for, the dates are out! April 22-29, 2013 is the Spring Kids Clothes Week. I was also pretty excited to see that Meg decided to expand KCW to four time per year — winter, spring, summer and fall. I for one could certainly use the motivation to focus on my kids’ wardrobes more, and more frequently replace the items that they outgrow. Summer KCW will also give me a great opportunity to focus on baby sewing! If you’re interested in participating, Meg started a new blog just for KCW — head over there to sign up!
Obviously, I’ve already signed up. I have lots of plans for spring sewing for the kids, largely because they both have large gaps in their wardrobes! There’s absolutely no way that I can accomplish everything that needs to be accomplished in one short week, so most likely I will be feverishly working to finish projects in the weeks before KCW so that I actually have stuff to share with you during the week.
I also have plans for the actual KCW week. Fall 2012 was the week of pants sewing for me since J desperately needed new pants. Spring 2013 KCW will likely be the week of the t-shirt.
Both kids need t-shirts, the month until KCW will give me plenty of time to raid Albert’s discarded t-shirt stash for raw materials, and the Flashback Skinny Tee takes me an hour or less to put together. I should be able to pump out quite a few t-shirts in a week. Maybe I’lll throw in a pillowcase top or easy pinafore dress for N, just to break up the monotony, though.
Now if Rae would only announce the 2013 Spring Top Sewalong, all my spring sewing dreams will have come true!
Are you planning to participate in KCW this year? What are you sewing?
Man, work has been crazy lately — I’ve had hardly any time to post anything recently!
But, I wouldn’t be much of a sewing Mommy if I couldn’t get around to making my kids Halloween costumes. Luckily, I managed to make good use of naptimes the weekend before Halloween, otherwise I probably wouldn’t have made it!
But I did, and I ended up with the cutest little cats ever — J dressed up as a “scary tiger” (his choice), and N as a little lion cub (also J’s choice).


I knew that if I attempted anything too complicated, these costumes would not happen, so I purposely chose very easy patterns.
I got the fleece for each of these costumes at Hancock Fabrics during their big fleece sale a couple of weeks ago. J picked out his favorite animal print fleece for his “scary tiger” costume, and N’s I actually managed to find in the remnant pile — score!
For the top, I used the Made by Rae Flashback Skinny Tee in size 3T for J and 18 months for N. As I’ve previously reported — great pattern, quickly becoming a favorite. It is quick and satisfying and a great way to easily expand the kids’ wardrobe. And maybe use some of the interesting t-shirts sitting around in our closets that Albert and I don’t wear anymore 🙂
The pants are the Sleeping Johns from the book Growing Up Sew Liberated. Again, super easy, really satisfying pattern. Also a new favorite. I made these in size 3T for J, and 2T for N. The pattern doesn’t come smaller than 2T, or else I would have made a smaller size for N since these were a little long. But once she hits size 2T, I will never buy her another pair of leggings! An old t-shirt and the Sleeping Johns pattern and I’m set!
And finally, the hats. For those I used the Cozy Winter Hood from Oliver + S’s Little Things to Sew. This may have been my favorite of the three to sew. It’s just so sinkin’ cute! And really easy, which wasn’t something I really expected. The only change I made was to make the ears on J’s hood pointy instead of rounded, and I used bias tape for his ties instead of ribbon. In fact, I used ribbon on N’s hood, and really wish that I had used bias tape — it just stays tied so much better!
N is in need of a few winter hats, so I might pull out some fleece and whip up a couple of hoods for her, minus the ears.
And there you have it — easy, simple Halloween costumes that completely satisfied my little toddlers and that I was able to put together in a single weekend! And because I can’t resist, here are a couple more pictures from our evening. Hope everyone else had a great Halloween!

Ready to roll!

N chowing down at the end of the day
I’m sure it will shock you all to discover that I sewed something other than pants last week!
Not much other than pants, but it was something. I was getting pretty darn sick of kids pants so these were a nice break.
First, I must be the absolute last person in the online sewing world to finally try out my copy of the Made By Rae Flashback Skinny Tee:

This is a great pattern. Quick, easy, and the fit is awesome. I made this T-shirt for J as an afterthought and it seriously probably went together in less than 2 hours. If I could refashion an old t-shirt and reuse the hems, it would be even faster. Definitely have to keep this pattern close by for just that!

Side note: This is the first project that J has ever willingly modeled for me. Before this (even just this past spring and summer), he acted as if my camera was going to suck the soul out of his clothes and threw huge fits if I asked him to model for me. “NO!! My pants, Mommy! MINE!” This may mark the start of better kids clothing photos from me — yay!!
This fabric is an amazingly soft Nani Iro by Naomi Ito double gauze knit that I’ve been hoarding for the last year (seriously–it was my birthday present to myself last year). I only had a yard of it because it was $30+ per yard and only 30″ wide and I just couldn’t bring myself to pop for more. That measly 1 yard was just enough to squeak out a size 3T Flashback Tee. With a few scraps leftover that I will probably hoard for another year. I’m not usually a scrap girl but these lusciously soft knit scraps are mine, I tell you, MINE!
And then my favorite project of the week. A catalogue knock off skirt for N that the little stinker stubbornly refuses to wear. You wouldn’t think a 17-month-old would have such strong opinions about clothes, but you would be wrong. Every morning she must approve her outfit choices and every morning this skirt is met with a definitive “no” and a shake of her head.
I saw a picture of this Velvet and Tweed skirt on Pinterest a couple of weeks ago and knew that I wanted to recreate it:

Except I wanted to make mine fully reversible. It took a bit of puzzling but I figured it out and I think the result is awesome!
Here’s mine:

And the reverse side:

I took pictures as I was making it, so this will become a tutorial once I take the time to put it together!
Maybe by then I’ll have wrassled N into the skirt for some pictures. I will not be defeated by a 17-month-old…will I?
Once again I’m behind on KCWC posting, mostly because I haven’t been able to take pictures!
Between my burnout and N’s bout with the croup, these pants almost didn’t happen. Fate certainly was conspiring against them anyway!
But I finally finished them on Friday night, and they are pretty cool, if I do say so myself. Maybe my favorite of the three pairs I made this week!

The fabric is a black and white houndstooth twill that I bought from Chez Ami last winter. For the patches and pockets, I just cut the fabric on the bias, and I really like the effect! A little more subtle but it adds some interest.
I bought about 4 yards of this fabric so I think some of it is destined to become another Kelly Skirt for me! (I still have to blog my wearable muslin).
Originally I had planned to post a tutorial today on how I’ve been salvaging N’s outgrown onesies and t-shirts, but that will have to wait for another day!
I finished J’s second pair of pants on Tuesday night and stayed up so late to finish them that I was zonked and went to bed early last night. So pair #3 is sitting in my sewing room almost half done. Oh well, I’ll finish them tonight!
I took Albert’s suggestion and added some more “boy” details to this pair even though that meant they took longer than the purple pair. And they did turn out really cute:

Preemptively patching the knees was probably a good idea. I don’t think J owns a single pair of pants that hasn’t ended up with knee patches. It’s WAY easier to do that on the front end!
I mentioned before that all of the pants I’m making for J this week are lined. The weather is getting chilly here and while we in Kansas rarely get the arctic-like winter that I grew up with in Iowa, it is proving to be unseasonably cold this fall. I guess this will be a year of extremes! I figured that lining these pants couldn’t hurt.
It is so easy to line a basic pair of kids’ pants (since there usually aren’t zip flies etc to worry about). I love the lined look because in addition to warmth, it hides all of the interior seam allowances!
I lined these green twill pants with a gray flannel that was sitting around in my stash. I picked it up in the remnants bin at Joann’s ages ago and it was just the right amount of fabric for a lining! Since the purple pants were corduroy, which is already a slightly heavier fabric, I used jersey to line those. Even quilting cotton would work if you wanted a pop of pattern inside the pants, but I like the softness of knits or flannel.
So here is a mini-tutorial on how I lined these pants for J. I’m sure there are several ways to line a pair of pants, and I don’t claim that mine is the only, or even the best, way. It’s just the way that made sense to me when I sat down to puzzle this out. Also, this is the first time I’ve ever put together a tutorial of any kind, so I’m very open to any constructive criticism you may have! (Please keep it constructive though, this is my happy place).
How to line a basic pair of kids pants:
Step 1: Sew the crotch seams, side seams and inseams on the pants in both your outer fabric and lining fabric. I won’t go through the steps on how to do this. I used the MADE basic kids pants pattern for J’s pants, and Dana has detailed instructions on how to assemble the pants here. (Dana also did a tutorial on lining pants. I didn’t use that tutorial, so I’m doing my own, but hers can be found here).

Step 1: Construct your pants. I did the patches and pocket on my outer pants at this stage so all the interior stitching would be hidden.
The basic kids pants pattern doesn’t have any pockets or a separate waistband piece. You could easily line pants that have pockets, though, and all of the interior pocket pieces would be sandwiched between the outer fabric and the lining, maintaining that nice, smooth, soft interior! To do that, you would assemble the outside pieces, including the pockets, to the point where you were going to add waistband and hems. Assemble the inside pieces without any pockets, and continue from there.
Step 2: Turn the outer pants piece inside out and iron under your hems and waistband on the outer piece only. For my waistbands, I ironed them under 1/2 inch, and then again about 1 1/4 inches all around. I wanted to maintain length in the legs, so I ironed under 1/2 inch then another 1/2 inch.

Step 2: Iron the waistband and hems on the outer piece
Step 3: Stuff the outer pants piece inside the lining piece, wrong sides together. Keep the waistband and hems folded under when you stuff the outer piece into the lining piece.

Step 3: Stuff the outer pants inside the lining piece.
Step 4: Trim the lining pieces at the waistband and legs so that they are about 1/4 inch shorter than the outer piece with the waistband and hems folded.

Step 4: Trim the lining.

Step 4: Trimming the lining — see how the lining is just a tad shorter than the folded waistband?
Step 5: Tuck the top and bottom of the lining piece underneath the folded waistband and hems and pin in place. Be sure to smooth everything out and line up your seams here. This is the time to insert a back tag, if you have one, or a piece of ribbon or twill tape. I used a scrap of twill tape so we’d know which side is the back.

Step 5: Tuck the lining inside the waistband and hems.
Step 6: Sew the waistband casing and hems, leaving a 2-inch gap on one side of the waistband casing.

Step 6: Sew the waistband casing and hems.
Step 7: Insert your elasic at the gap you left and pull it through the casing. Attach the ends. For J’s pants, I cut a 20″ piece of elastic and counted on a 1/2-inch of overlap when I sewed it together for a final waist circumference of 19″.

Step 7: Insert elastic into the waistband.
Step 8: Sew the waistband casing shut.
And you’re done! Comfy, cozy lined pants with no exposed interior seam allowances! Now go try them on your little guy or gal (or leave them on the sofa until morning because it’s 11:30 pm and the little guy or gal has been in bed for 4 hours and you should be sleeping too. I’ve never done that, though. Ahem. Really.).
Here’s my finished interior:

And my patches and pockets:

J was a fan! He loved the cars all over his pants, and informed me that they were nice and soft!
